
This article show the steps how to replace G503 WWII Jeep MB GPW Split Rim Replacing Wheel Studs.


|
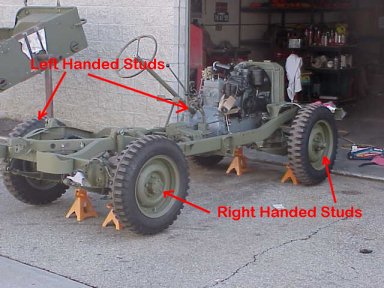
1. Many rough projects start out with wheel drums that may have left or right handed studs, or worse yet, right and left on one drum. Here is a CAUTIONARY article to show how you can replace the wheel drum studs. |
|
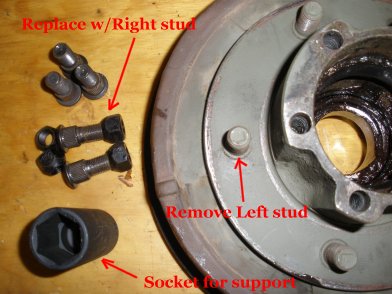
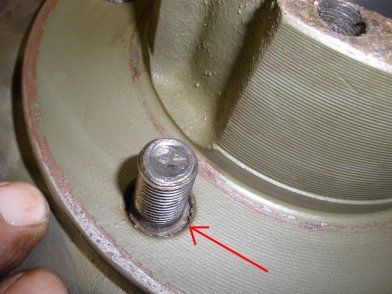
2. Caution: this article will shows you how to replace wheel studs, but there are reasons why NOT to replace them (we will explain). To start, we have a drum with Left handed studs, we want to replace with Right handed studs. Here we use a socket that will go around the stud to support the pressing the old stud out, so not to bend/warp the drum |
|
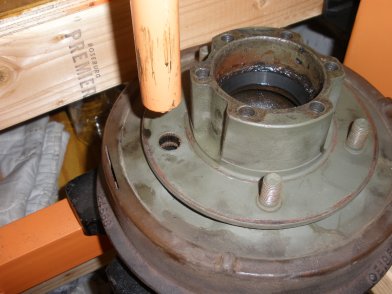
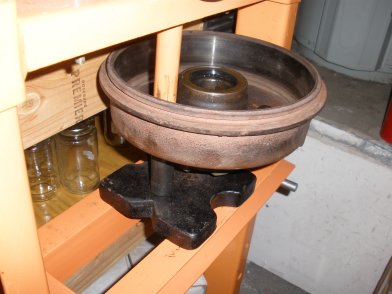
3. Place the socket under the stud you want to press out on the drum. Since the studs can be frozen in the drum over the years, soaking over night in pentrating oil will help. Here the drum is placed on a 12 ton press |

|
4. Line up the drum with the stud you want to press out. Make sure the socket under the drum is lined up and tallter that the drum itself, as the stud will need to fall into the socket below. |
|
5. Apply the press to the wheel stud and with a bit of pressure the stud will drop out into the socket below. |
|
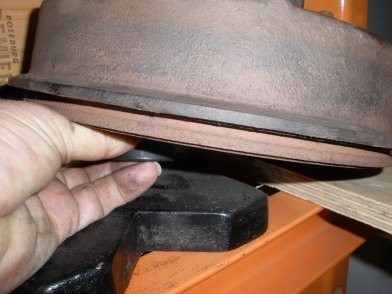
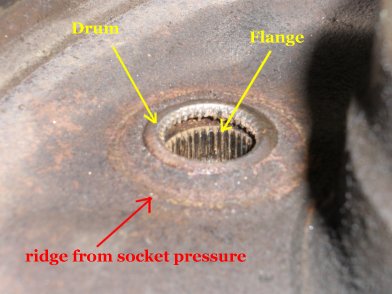
6. Here is what you need to be prepared for. You can damage your wheel drum easily, by warping under pressure. In addition you will see why the Drum and Flange ridges will be in an issue shortly. Ideally, the wheel studs should be de-swaged and swaged back in. |
|
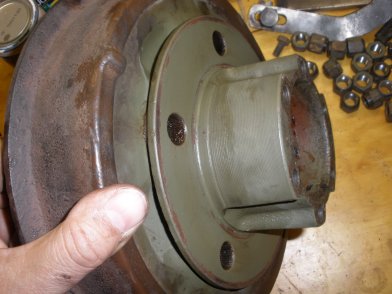
7. Repeat the steps above for pressing all the studs out of the drum. Your flange may stay connected to the drum, but ideally they could easilty be pulled a part. |
|
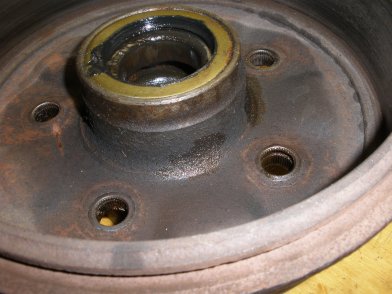
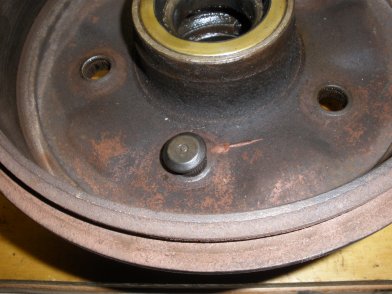
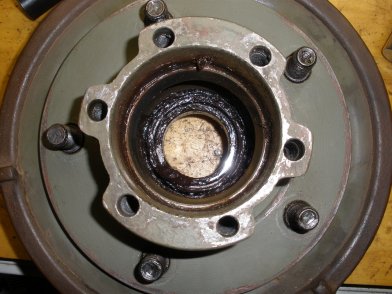
8. Inspecting the drum after the pressing looks pretty good, no warping of the drum, and everything appears to be ok. |
|
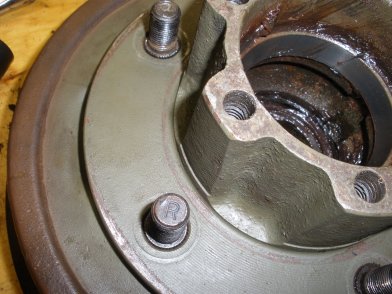
9. At first glance, looking to see if the new right handed studs will press in tight looks good. I try to see the resistance on each hole. |
|
10. Well, 2 of the 5 studs go all the way to rim, fairly loose. How? what happened? 3 of the 5 will be nice and tight, but 2 will not. |
|
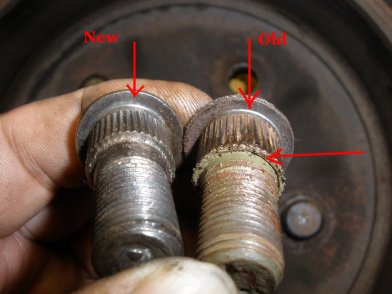
11. When you compare the studs pressed out, you can see on the two that were pressed out that they have a larger area of skin around them. Apparently when swaged in at assembly they expand a bit. So pressing them out can make the replacements fit loosely. |
|
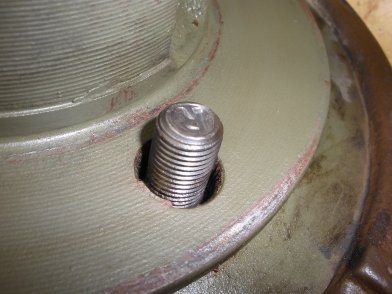
12. The only way to fix this issue, is to press in the new studs and weld the loose ones. Here you see a tight stud being lined up to be pressed in. NOTE: the Studs need to go in straight. |
|
13. Here you see the pressing in of the new studs is reverse of pressing out. Still using the socket for support. The stud is lined up and ready to press in. |
|
14. Repeating the steps above for the remaining studs you can see that the stud is pressed both into the flange and the drum itself. But, I still need to take care of the two studs that are not as tight as these three |
|
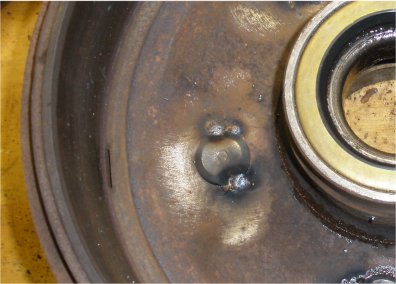
15. Realistically, the pressure of the tightened nut on the stud may hold it in place, but here to ensure the stud will not move, we applied a couple welds to verify the stud will not strip in the drum. Nobody likes this solution, but this is the risk when you replace your studs |
|
16. When completed, all of the studs are replaced and straight. A new drum and flange you can easily press the studs in nice and tight, but the original drums may have the issues we have shown in this article. Hope it helps! |
