
This article shows has mutliple purposes, if you need to replace your crank shaft pulley, or the crankshaft pulley seal on the timing chain cover.


|
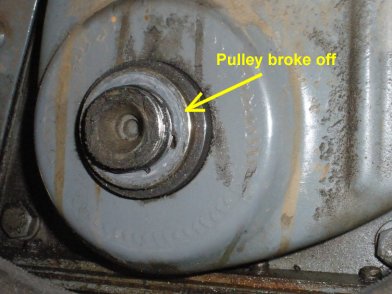
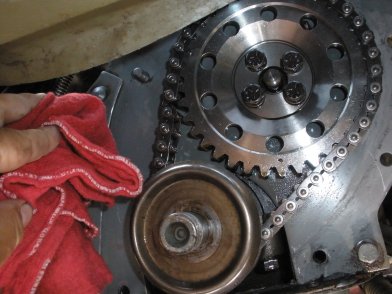
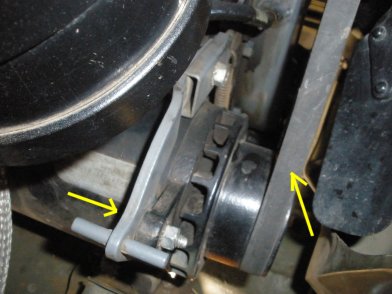
1. Crankshaft Pulleys or Crankshaft seals will fail over time. In this article we need to replace the Crankshaft pulley and the crankshaft seal behind the timing chaing. Here you see a typical pulley that has recently broken over time. |

|
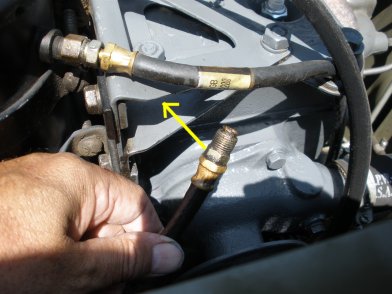
2. Since we had a little oil leakage from this area anyway, the goal is to fix the problem completely. Which means, we need to take the timing cover off in order to get to replace the crankshaft seal. We start by disconnecting the oil line. |
|
3. Tuck the oil line under the oil filter bracket, as gravity will cause oil to leak from the canister if it drops below the leave of the oil canister |
|
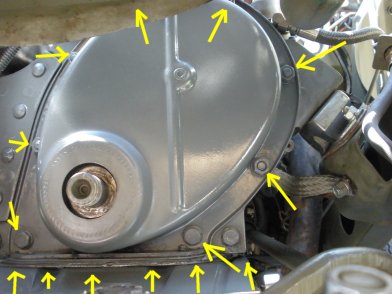
4. Next, remove all the bolts from the bottom pulley guard, and the timing chain cover. |
|
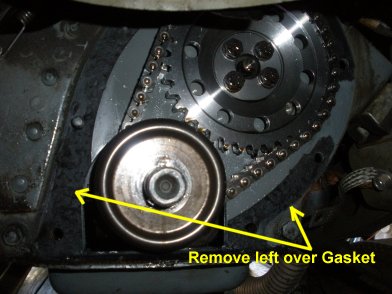
5. Use a scraper to fit between the gasket and timing chain cover and start to pry off. When the cover comes off there will be partial gasket remains on the block. This needs to be removed. Continue to scrap off the remainder of the gasket. |
|
6. Here a rag is wet with laquer thinner and wipped the area where the gasket will be replaced. |
|
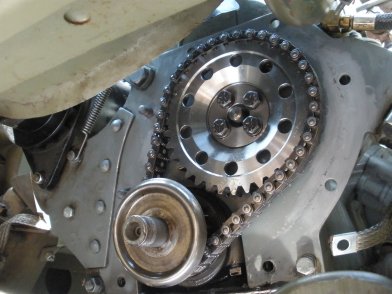
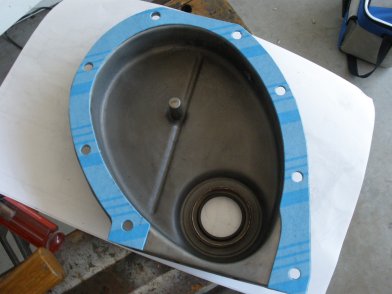
7. Here you see the area is cleaned off and ready for replacement. In this case the dark areas are not remaing gasket pieces, these were small pitted areas. |
|
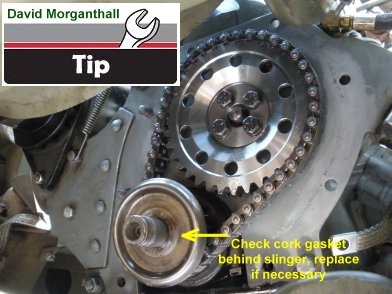
8. TIP: Since the slinger is easily removed, it is recommended to check the cork gasket behind the slinger. Replace this gasket if necessary. |
|
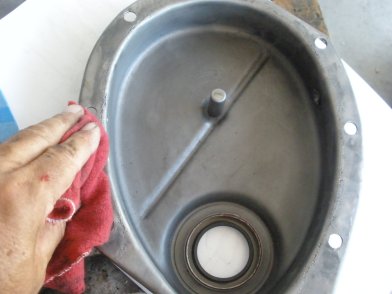
9. Remove any remaining gasket on the timing chain cover. Use a scraper, then clean with a laquer thinner. |
|
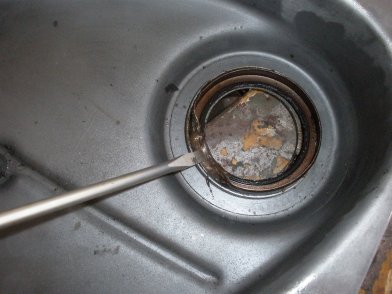
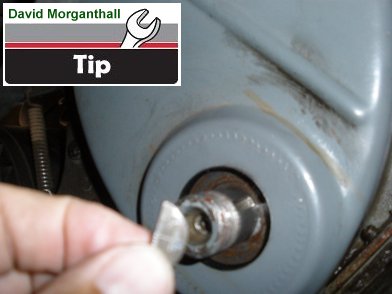
10. To pop the seal out, find an edge, and pop the edge to the center of the hole with a screwdriver or punch. Try very hard not to damage the timing chain cover. |
|
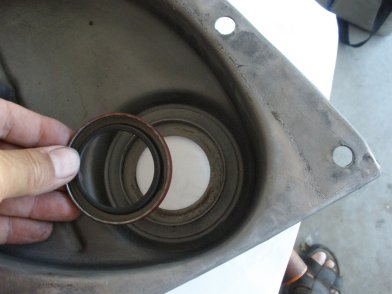
11. Once you have the oil seal penetrated to the center, you can pop the crankshaft oil seal out pretty easily. |
|
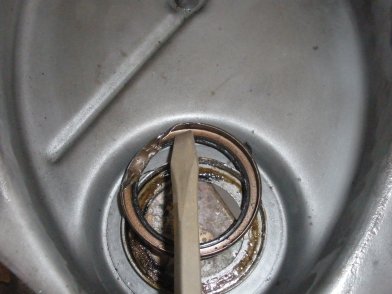
12. Clean the area inside the timing chain cover where the replacement seal will go. Set the seal into the timing chain cover evenly and press with your hands as far as it will go. |
|
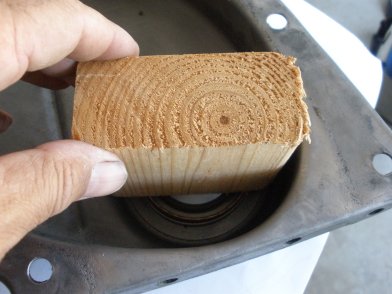
13. With a small piece of wood tap the new crankshaft oil seal into place. |
|
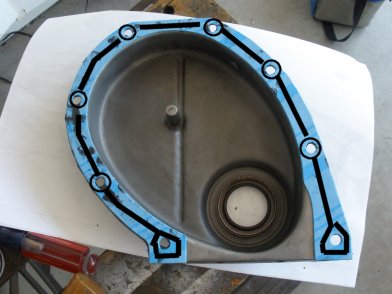
14. Next, place a small amount of gasket sealer around the new gasket and place on the timing chain cover. Wait a few minutes for the gasket sealer to set up on the gasket. |
|
15. After a few minutes of the bottom side setting up... place a very light amount of gasket sealer around the holes and the gasket and prepare to re-install. |
|
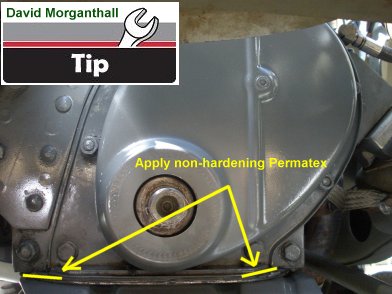
16. To prevent a leak at the pan/cover joint, apply non-hardening Permatex especially at the two ends. Some of the cover gaskets also call for copper spray by the makers. Also, if the cover will not slide |
|
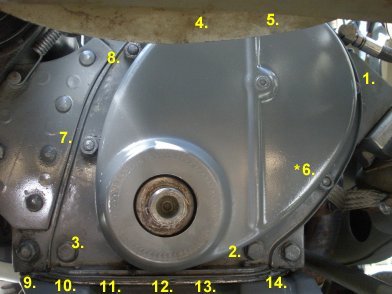
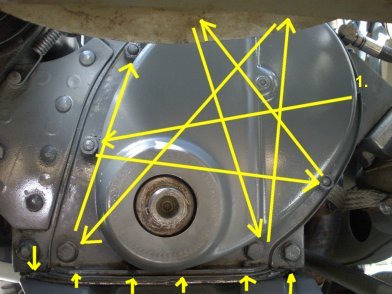
17. Installing the bolts back can be a little tricky. You want to start these bolts, but DO NOT TIGHTEN till all are secure. Shown here is the order of hardest to easiest. For example, don't wait to the end to do number 1. This one is difficult to reach, so get it done first. Note: #6 do not foget the bond strap behind bolt. |
|
18. Once all the bolts are on with lock washers and nuts, then start at 1, and criss cross tightening the the nuts and bolts evenly as shown for and even pressure while the sealer is setting up. John Gibbin's Tip: Do not tighten all the way up, you want to get the pulley back on so the timing chain cover is concentric around the shaft (as shown in #25). Don't forget the crankshaft pulley guard bolts at the bottom. |
|
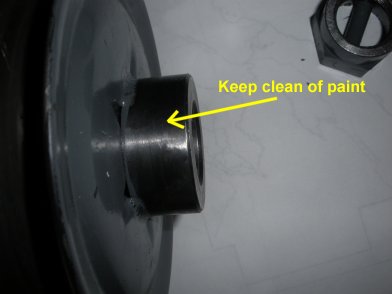
19. If you paint your new pulley, be sure not to paint the area the seal will be surrounding. |
|
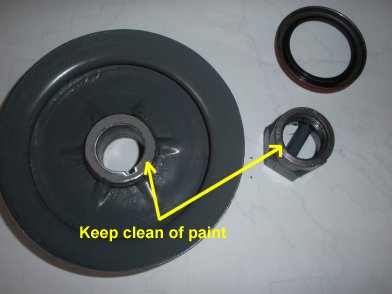
20. On the front side of the crankshaft pulley you want to clean paint off this area as well as the cranknut. |
|
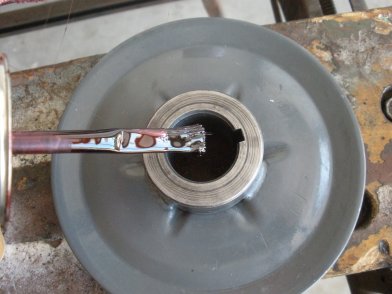
21. *OPTIONAL*. To help stop oil leaks, we apply a high temp sealer on the inside of the crankshaft pulley. This is completely optional, and may not needed |
|
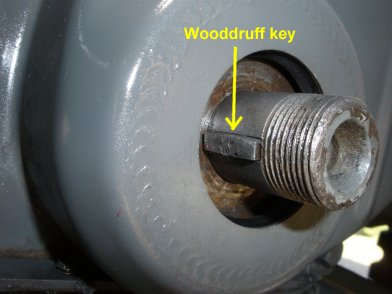
22. Place a small amount of grease inside the assembly for the pulley to slide on easily. The crankshaft pulley will fit around the Wooddruff key in the crankshaft. |
|
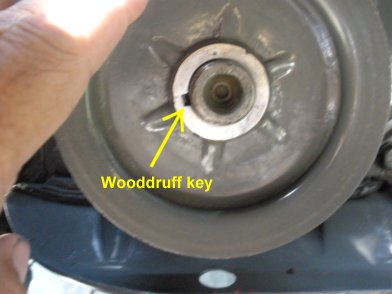
23. Flatten the oil slinger and use a new wooddruff key. The wooddruff key, too often, has been filed and allow for movement which on some engines had damaged the cranks beyond repair. |
|
24. Now fit the crankshaft pulley over the woodruff key and press back as far as it will go. |

|
25. Add the crankshaft nut, and tighten down. |
|
26. The crank threads are in many cases damaged and THE REPRO NUTS ARE THE WRONG SIZE. To avoid not getting the pulley pulled in to prevent end play issues, take a flat washer and use it to guarantee the parts and all draw together. Then remove the nut & washer and reinstall the nut, then check end play. Once the pulley is in place any thread issues seem to take a back seat and allow the nut to seat correctly. |
|
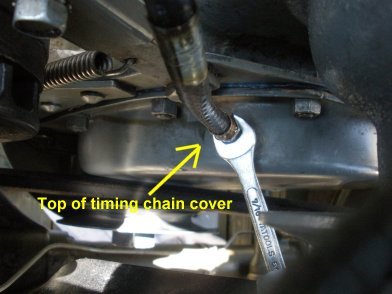
27. Replace the top oil line back on the cover of the timing chain cover. |
|
28. If not already loose, loosen the generator arm, then replace the belt around the pulley, water pump and generator. Align your generator and give about a 1/2 in play in the belt, as mentioned in the TM's, then tighten the generator arm down into place. Start up the jeep and look for leaks. Should be good. |
